Luneville and Aari. Bead Tool Embroidery: Easy Guide to Stunning Designs

Luneville and the technique from Aari. bead tool embroidery is a fun and creative way to make beautiful designs on fabric. Therefore, if you love sparkly beads and shiny sequins, this embroidery style is perfect for you! In this blog post, we’ll explore what Luneville and Aari embroidery are, how they work, and why they’re so special. Moreover, we’ll share easy steps to get started, the tools you need, and tips to make your designs shine. So, let’s dive into the world of Luneville and Aari embroidery!
What Is Luneville and Aari Bead Tool Embroidery?
Luneville and Aari embroidery are two similar techniques that use a special hook to create chain stitches on fabric. Specifically, these stitches can hold beads and sequins, making your designs sparkle. For instance, Luneville embroidery started in France, while Aari comes from India. Both methods use a hook, often called a Luneville and Aari bead tool, to make patterns quickly and beautifully.
In Luneville embroidery, you work on the back of the fabric, and the beads appear on the front. Meanwhile, Aari embroidery is done on the front, with beads threaded directly onto the fabric. Consequently, both techniques are fast and perfect for adding glamour to clothes, bags, or even home decor like pillows.
The History of Luneville and Aari Embroidery
Luneville Embroidery: A French Tradition
Luneville embroidery began in the French town of Lunéville around the 18th century. At first, embroiderers used needles to create chain stitches on light fabrics like tulle. However, in the 19th century, they switched to a hook, which made the work faster. By 1865, a man named Louis Ferry-Bonnechaux started adding beads and sequins, making Luneville embroidery famous for its sparkle. Today, big fashion houses like Chanel and Dior use this technique for fancy dresses.
Aari Embroidery: An Indian Art
Aari embroidery, also called Zari or Moochi Aari, started in India over 500 years ago. The word “Aari” means hook in Hindi, and artisans used a thin, hooked needle to create chain stitches. For example, cobblers in Gujarat used Aari to decorate leather and cloth with floral and animal designs for royalty during the Mughal Empire. Later, this technique spread to other parts of India, becoming popular for bridal wear and home decor.
How Luneville and Aari Are Connected
Although Luneville and Aari come from different places, they share the same idea: using a hook to make chain stitches. In fact, Luneville embroidery likely came from Aari techniques brought to Europe from India. Both methods are great for adding beads and sequins, but they differ in how the hook is used. For instance, Luneville hooks are often interchangeable, while Aari hooks are fixed in a wooden handle.
Why Use the Luneville and Aari Bead Tool?
The Luneville and Aari bead tool is what makes these techniques special. Here’s why it’s so great:
- Speed: The hook lets you stitch faster than a regular needle because you don’t need to cut and rethread the thread.
- Beauty: Beads and sequins add sparkle, making your designs look fancy and professional.
- Versatility: You can use these techniques on clothes, bags, pillows, or even jewelry.
- Ease: Once you learn the hook, it’s like crocheting—fun and not too hard!
Tools You Need for Luneville and Aari Bead Tool Embroidery
To start with Luneville and Aari bead tool embroidery, you need a few simple tools. Here’s a list to help you get ready:
- Embroidery Hook: This is the Luneville and Aari bead tool. Luneville hooks are small and fit into a holder, while Aari hooks are longer and have a wooden handle. You can find them online at places like Etsy.
- Embroidery Frame: A frame keeps your fabric tight. For Luneville, use a slate frame that stands on its own. For Aari, a hoop or a frame called a “khaka” works well.
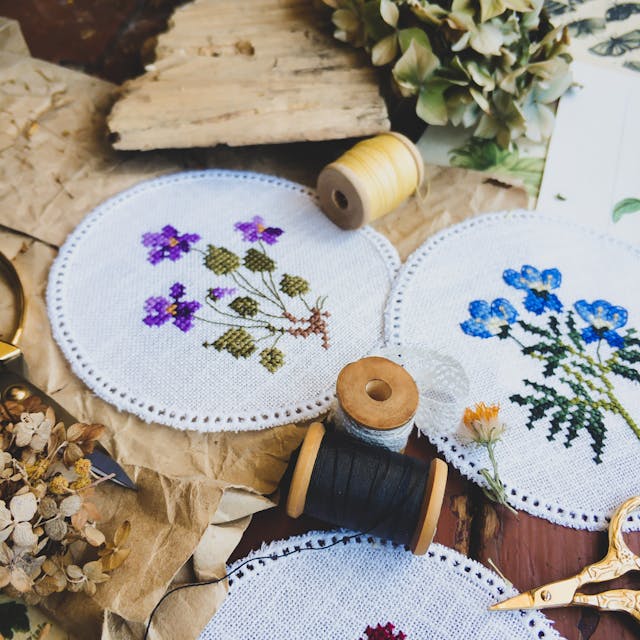
- Fabric: Choose a woven, non-stretchy fabric like silk organza or cotton. It should be thin enough to see through but strong enough to hold beads.
- Beads and Sequins: Use high-quality seed beads (like Miyuki or Toho) or bugle beads. Avoid cheap beads, as they can break or look dull.
- Thread: Pick a strong, thin thread that matches your fabric or beads. Wax-coated threads are great because they don’t fray.
- Scissors: Small, sharp scissors help you cut thread cleanly.
- Beading Needle: A big-eye beading needle makes it easy to string beads onto your thread.
You can buy these tools from online stores like EmbroideryMaterial or AariMaterials.
How to Start Luneville and Aari Bead Tool Embroidery
Ready to try Luneville and Aari bead tool embroidery? Follow these easy steps to begin:
Step 1: Set Up Your Frame
First, stretch your fabric tightly on an embroidery frame or hoop. For Luneville, use a slate frame to keep both hands free. For Aari, a hoop works fine. Make sure the fabric is as tight as a drum so your stitches stay neat.
Step 2: Draw Your Design
Next, draw your design on the fabric with a washable marker or pencil. Simple patterns like flowers or swirls are great for beginners. For Luneville, draw on the back of the fabric. For Aari, draw on the front.
Step 3: Thread Your Beads
Before you start stitching, string your beads onto the thread using a beading needle. For Luneville, you’ll slide beads onto the thread as you work. For Aari, you add beads directly while stitching.
Step 4: Learn the Chain Stitch
The chain stitch is the heart of Luneville and Aari bead tool embroidery. Here’s how to do it:
- Luneville: Hold the hook in one hand and the thread under the fabric in the other. Push the hook through the fabric, catch the thread, and pull it up to form a loop. Slide a bead onto the thread, push the hook through again, and repeat. The bead will sit on the front of the fabric.
- Aari: Hold the hook above the fabric and push it through to catch the thread. Pull the thread up to form a loop, then add a bead or sequin. Push the hook through again to secure it.
This stitch looks like a chain, which is why it’s called a chain stitch!
Step 5: Add Beads and Sequins
Once you’re comfortable with the chain stitch, start adding beads or sequins. For Luneville, slide them down the thread before making a stitch. For Aari, place them on the fabric and secure them with the hook. Practice makes this step easier
Step 6: Finish Your Design
Keep stitching until your design is complete. Then, tie off the thread on the back of the fabric and trim any extra. Your beautiful creation is ready to show off!
Tips for Success with Luneville and Aari Bead Tool Embroidery
To make your Luneville and Aari bead tool embroidery even better, try these tips:
- Practice First: Start with plain thread to learn the chain stitch before adding beads.
- Use Quality Materials: Good beads and threads make your work look professional.
- Keep Fabric Tight: A loose fabric makes messy stitches, so check your frame often.
- Work Slowly: Don’t rush. Slow and steady stitches look neater.
- Watch Tutorials: Check out videos on YouTube for Luneville and Aari embroidery to see the hook in action.
Differences Between Luneville and Aari Bead Tool Techniques
Although Luneville and Aari bead tool embroidery are similar, they have some differences. Here’s a quick comparison:
Both techniques are great, so you can choose the one that feels right for you!
Why Luneville and Aari Bead Tool Embroidery Is Popular
Luneville and Aari bead tool embroidery is loved by many because it’s fast, beautiful, and versatile. For example, fashion designers use it to create stunning dresses for red carpets. Additionally, crafters use it to decorate bags, pillows, or even shoes. The sparkly beads and sequins make every piece look special, and the hook makes it quicker than regular needle embroidery.
Moreover, this embroidery is perfect for anyone who loves crafts. You don’t need to be an expert to start, and the results are always impressive. Plus, it’s a great way to relax and be creative!
Where to Learn Luneville and Aari Bead Tool Embroidery
If you want to learn more about Luneville and Aari bead tool embroidery, there are many ways to get started:
- Online Classes: Websites like Corset Academy offer video courses for beginners.
- Workshops: Look for in-person classes at places like Hand & Lock in London. They teach you how to use the hook and add beads.
- YouTube Tutorials: Free videos on YouTube show step-by-step instructions. Search for “Luneville embroidery” or “Aari embroidery.”
- Books: Books like La Broderie de Luneville by Roland Gravelier are great for learning more about the history and techniques.
Projects to Try with Luneville and Aari Bead Tool Embroidery
Once you’ve learned the basics, try these fun projects:
- Decorated Tote Bag: Add beads and sequins to a plain tote bag for a sparkly accessory.
- Embroidered Pillow: Create a floral design on a pillowcase to brighten your room.
- Beaded Bracelet: Use the chain stitch to make a sparkly bracelet with seed beads.
- Fancy Dress: Add Luneville or Aari embroidery to a dress for a special event.
These projects are easy and let you practice your new skills!
FAQs About Luneville and Aari. Bead Tool Embroidery
What is the difference between Luneville and Aari embroidery?
Luneville embroidery is done on the back of the fabric, while Aari is done on the front. Luneville uses interchangeable hooks, and Aari uses fixed hooks. Both use a hook to make chain stitches with beads or sequins.
What kind of hook should I use for Luneville and Aari bead tool embroidery?
For Luneville, use a small hook that fits in a holder. For Aari, use a longer hook with a wooden handle. Both are called Luneville and Aari bead tools. You can buy them on Etsy.
Can beginners do Luneville and Aari embroidery?
Yes! Start with simple chain stitches and practice without beads. Watch tutorials and use good tools to make it easier.
What fabrics work best for Luneville and Aari bead tool embroidery?
Use woven, non-stretchy fabrics like silk organza or cotton. They should be thin but strong to hold beads.
Where can I buy beads for Luneville and Aari embroidery?
Buy high-quality beads like Miyuki or Toho from EmbroideryMaterial or other craft stores. Avoid cheap beads for better results.
Conclusion
Luneville and Aari bead tool embroidery is a fun and exciting way to create sparkly designs. Whether you’re decorating a dress, bag, or pillow, these techniques make your work stand out. By using a simple hook, you can add beads and sequins quickly and easily. So, grab your Luneville and Aari bead tool, stretch your fabric, and start stitching! With practice, you’ll create beautiful pieces that everyone will love. Happy embroidering!